film camera manual
Summary
Lost your film camera manual? Jayasinha.com has a huge collection of free downloadable manuals for classic cameras. Get shooting again! **Film Camera Manual** access now.
Film cameras offer a tangible, artistic approach to photography, diverging from digital’s immediacy; exploring various formats—35mm, medium, and large—provides unique creative avenues․
Choosing film today embraces a slower, more deliberate process, fostering a deeper connection with the art of image-making, and yielding distinctive aesthetic qualities․
What is a Film Camera?
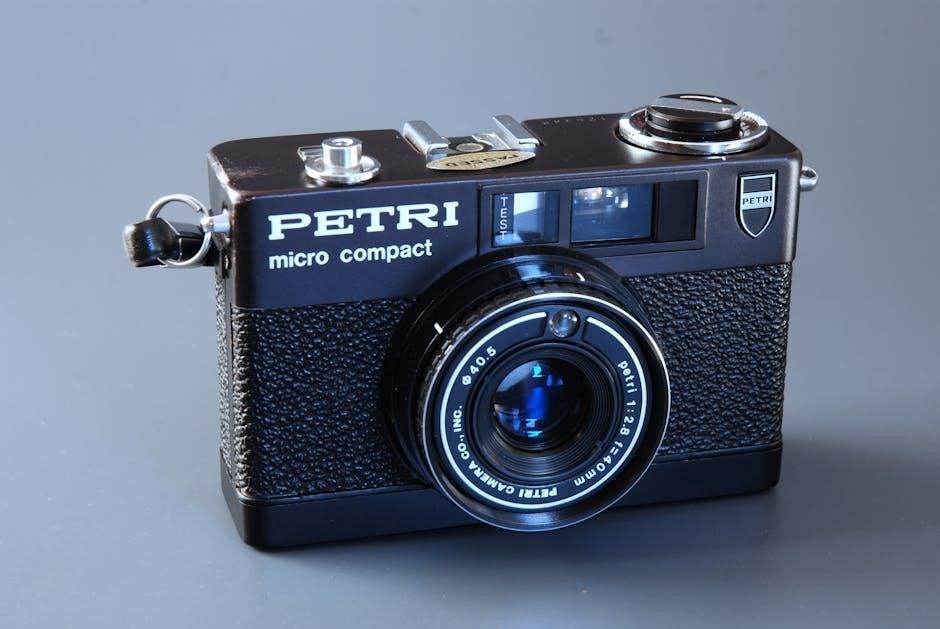
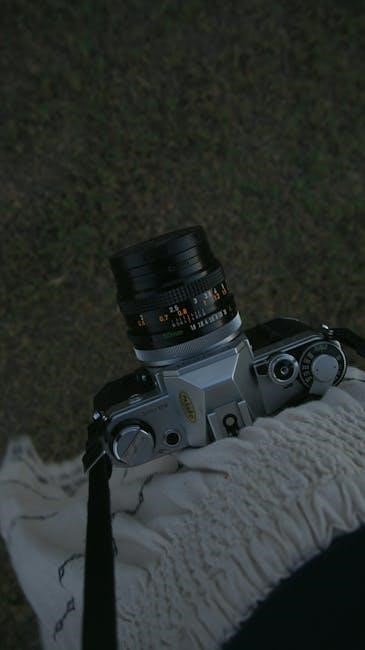
A film camera, fundamentally, is a light-tight box with a lens used to focus light onto a photosensitive material – film․ Unlike digital cameras that capture images electronically, film cameras rely on chemical reactions triggered by light exposure to create a latent image on the film․ This image is then developed through a chemical process to become visible․
Historically, these cameras were the primary means of capturing photographs for over a century․ They come in diverse forms, including Single Lens Reflex (SLR), Rangefinder, and Twin Lens Reflex (TLR) models, each offering unique operational characteristics․ Understanding the mechanics – the lens focusing, the shutter controlling exposure time, and the aperture regulating depth of field – is crucial․
A film camera manual is essential for understanding the specific functions of your camera model, detailing film loading, shooting modes, and maintenance procedures․ It’s a gateway to unlocking the full potential of analog photography․
Why Choose Film Photography Today?
In a digital age, choosing film photography might seem counterintuitive, yet it offers a unique and rewarding experience․ It encourages a slower, more deliberate approach to image-making, forcing photographers to carefully consider each shot․ This contrasts sharply with the instant gratification and endless shooting of digital cameras․
Film possesses a distinctive aesthetic – a certain grain, color rendition, and dynamic range – that many find appealing․ Furthermore, the tactile process of loading, shooting, and developing film fosters a deeper connection with the art form․ A film camera manual becomes your guide, unlocking these possibilities․
Beyond aesthetics, film photography can be a refreshing escape from the digital world, promoting mindfulness and creativity․ It’s a chance to embrace imperfections and celebrate the beauty of analog processes․

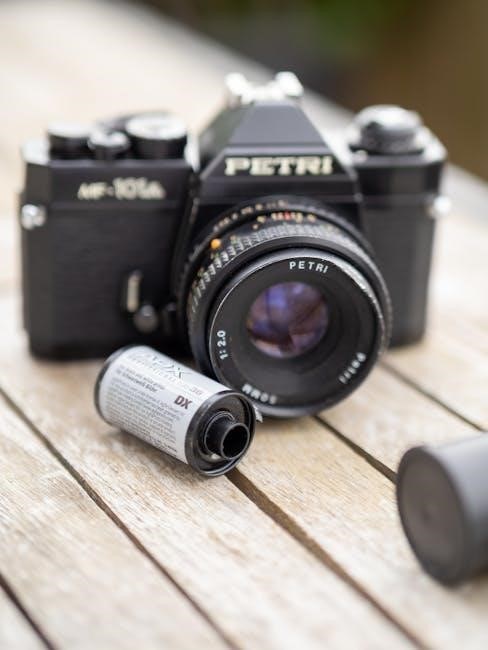
Types of Film Cameras
Diverse film cameras exist—35mm, medium format, large format, rangefinders, and TLRs—each offering unique features and benefits for varied photographic pursuits and styles․
35mm Cameras: The Most Popular Format
35mm cameras represent the most accessible and widely used film format, celebrated for their versatility and relatively compact size․ They’re ideal for everyday photography, street photography, and a broad spectrum of creative endeavors․ The abundance of available 35mm film stocks – color negative, color slide, and black and white – provides photographers with extensive options for achieving diverse aesthetic results․
These cameras range from fully automatic point-and-shoots, perfect for beginners, to sophisticated manual models offering complete control over aperture, shutter speed, and focus․ This format’s popularity translates to a large selection of affordable and well-maintained cameras on the used market․ Understanding the interplay between these settings is crucial for mastering 35mm photography, allowing for precise exposure and creative depth-of-field control․ The 35mm format strikes a balance between image quality, convenience, and cost, making it a fantastic starting point for anyone venturing into film photography․
Medium Format Cameras: Higher Quality Images
Medium format cameras utilize film that is larger than 35mm, typically 120 film, resulting in significantly higher image quality and detail․ This larger negative or slide area captures more information, leading to greater resolution, smoother tonal gradations, and a distinctive aesthetic often favored by professionals and serious enthusiasts․ Cameras like the Mamiya RB67, mentioned as a “true system camera,” exemplify the capabilities of this format․
While generally larger and more expensive than 35mm cameras, medium format systems offer unparalleled creative control․ They are frequently employed in portraiture, landscape, and commercial photography where exceptional image quality is paramount․ A variety of film types are available in 120 format, including color negative (like Kodak Portra), color slide (Fujichrome Velvia/Provia, Kodak Ektachrome), and black and white options․ Mastering medium format requires a greater understanding of photographic principles, but the rewards are substantial․
Large Format Cameras: For Professionals
Large format cameras represent the pinnacle of film photography, employing very large sheets of film – typically 4×5 inches or larger․ These cameras are primarily used by professionals demanding the absolute highest image quality, detail, and control․ The substantial film size yields incredibly detailed negatives or transparencies, ideal for large-scale prints and archival purposes․
Operation of large format cameras is considerably more complex than with smaller formats, involving meticulous setup, precise focusing using ground glass, and careful exposure calculations․ Movements – the ability to manipulate the lens and film plane – allow for extensive control over perspective and depth of field․ While demanding, large format photography offers unmatched creative possibilities․ Due to their size and complexity, these cameras are generally used in studio settings or for landscape photography where portability is less of a concern, delivering exceptional results for discerning photographers․
Rangefinder Cameras: Compact and Precise
Rangefinder cameras offer a compelling blend of portability and precision, historically favored by photojournalists and street photographers․ Unlike SLRs, they utilize a separate viewfinder coupled to a rangefinder mechanism, allowing for accurate focusing without looking through the taking lens․ This system enables quicker, more discreet shooting, ideal for capturing candid moments․
These cameras are typically smaller and quieter than SLRs, making them less intrusive․ Focusing is achieved by aligning two images in the viewfinder – a process that becomes intuitive with practice․ While they generally offer interchangeable lenses, rangefinders often have a shorter flange distance, allowing adaptation of lenses from various systems․ They represent a classic approach to photography, prized for their compact size, precise focusing, and ability to deliver exceptional image quality in diverse shooting scenarios․
Twin-Lens Reflex (TLR) Cameras: Classic Style
Twin-Lens Reflex (TLR) cameras represent a distinctive era in photographic history, instantly recognizable by their unique design featuring two identical lenses mounted side-by-side․ The top lens serves as the viewing lens, while the bottom lens projects the image onto the film․ This configuration eliminates parallax error – the discrepancy between what you see through the viewfinder and what’s recorded on film – particularly noticeable in close-up shots․
TLRs are often medium format cameras, producing larger negatives than 35mm, resulting in higher image quality and detail․ They are known for their relatively quiet operation and straightforward mechanics․ While not offering interchangeable lenses, their classic aesthetic and unique shooting experience continue to appeal to photographers seeking a nostalgic and deliberate approach to image-making․ They embody a timeless elegance and a slower, more thoughtful photographic process․
Understanding Film Types
Film selection dramatically impacts image aesthetics; options include color negative, vibrant color positive (slide), and timeless black and white, each offering unique characteristics․
Color Negative Film: Everyday Photography
Color negative film, frequently called color print film, stands as the most prevalent type for general photographic endeavors․ Its forgiving nature makes it exceptionally beginner-friendly, capable of capturing a wide spectrum of scenes and subjects with commendable accuracy․ Kodak’s Ektar and Portra lines exemplify this category, delivering vibrant, saturated colors and fine grain—ideal for portraits and landscapes alike․
The process involves creating a negative image on the film, which is then inverted during printing or scanning to produce the final positive picture․ This inherent characteristic provides a degree of latitude in post-processing, allowing for adjustments to contrast and color balance without significant degradation․ Its versatility and relative affordability contribute to its enduring popularity among both amateur and professional photographers seeking reliable, high-quality results for everyday shooting․
Color Positive (Slide) Film: Vibrant Colors
Color positive film, also known as slide film or transparency film, produces images with exceptionally vivid colors and high contrast, presenting a direct positive on the film itself․ Unlike negative film, it requires no inversion during printing, making it suitable for projection as slides or direct scanning․ Kodak Ektachrome, recently re-issued, is a prime example, renowned for its fine grain and natural color rendition․
Fujichrome Velvia and Provia are also highly regarded choices, offering distinct characteristics – Velvia for intensely saturated colors and Provia for more balanced, versatile tones․ Slide film demands precise exposure, as its limited latitude offers less room for error in post-processing․ However, the resulting images boast exceptional clarity and brilliance, making it a favorite among landscape and nature photographers seeking impactful visuals․
Kodak Ektachrome
Kodak Ektachrome, a celebrated color reversal film, has experienced a resurgence in popularity following its re-introduction․ Known for its fine grain, vibrant yet natural colors, and excellent sharpness, Ektachrome E100 is a versatile choice for various photographic applications․ It’s particularly well-suited for landscapes, portraits, and commercial work where accurate color reproduction is paramount․
Ektachrome’s relatively fine grain allows for significant enlargement without noticeable degradation, making it ideal for creating large prints or high-resolution scans․ While demanding accurate exposure due to its limited latitude, the resulting slides exhibit a unique aesthetic quality․ Photographers appreciate its ability to capture subtle details and rich tones, offering a classic look that distinguishes it from modern digital imagery․ It’s a fantastic film for those seeking a traditional slide film experience․
Fujichrome Velvia & Provia
Fujichrome Velvia and Provia represent Fujifilm’s renowned contributions to color reversal film technology․ Velvia, famed for its intensely saturated colors and exceptionally fine grain, is a favorite among landscape and nature photographers seeking dramatic, vivid results․ Its high contrast and vibrant hues create images that truly pop, though careful metering is crucial to avoid blown-out highlights․
Provia, conversely, offers a more balanced and natural color palette with finer grain than Velvia․ It’s a versatile option suitable for a wider range of subjects, including portraits, travel, and general photography․ Provia’s broader exposure latitude provides more forgiving results, making it a good choice for beginners․ Both films deliver exceptional sharpness and detail, embodying Fujifilm’s commitment to quality and innovation in film manufacturing, offering distinct aesthetic choices․
Black and White Film: Timeless Aesthetics
Black and white film offers a classic, enduring aesthetic, stripping away color distractions to emphasize form, texture, and tonal range․ This medium encourages a focus on composition and light, resulting in images with a timeless quality and artistic depth․ The absence of color allows for greater creative control during development and printing, enabling photographers to manipulate contrast and mood․
Exploring black and white photography fosters a deeper understanding of photographic fundamentals․ It’s a versatile choice for various genres, from street photography and portraiture to landscapes and documentary work․ Iconic films like Kodak Tri-X and Tmax provide distinct characteristics, offering varying grain structures and tonal responses, allowing photographers to achieve unique visual styles and express their artistic vision․
Kodak Tri-X
Kodak Tri-X is arguably the most iconic and widely used black and white film, renowned for its classic look and versatility․ This medium-speed (ISO 400) film delivers a beautiful grain structure, providing images with a distinctive character and a timeless aesthetic․ It excels in a wide range of lighting conditions, making it suitable for various photographic genres, including street photography, photojournalism, and portraiture․
Tri-X’s forgiving nature and excellent tonal range make it a favorite among both beginners and experienced photographers․ It pushes well, allowing for increased sensitivity in low light, though with a corresponding increase in grain․ Its responsiveness to different developers offers considerable creative control, enabling photographers to tailor the final image to their specific vision․ Tri-X remains a staple for those seeking a truly classic black and white experience․
Kodak Tmax
Kodak Tmax films represent a modern approach to black and white photography, utilizing T-grain emulsion technology for exceptionally fine grain and high sharpness․ Available in various speeds – Tmax 100, 400, and 3200 – the Tmax series offers versatility for diverse shooting scenarios․ Unlike traditional grain structures, T-grain is more uniform and less prone to clumping, resulting in smoother tonal transitions and increased resolving power․
Tmax films are known for their excellent contrast and detail, making them ideal for applications where clarity is paramount․ They respond well to push processing, extending their effective ISO while maintaining image quality․ While offering a different aesthetic than the classic Tri-X, Tmax provides a refined and modern black and white experience, appealing to photographers seeking exceptional detail and sharpness in their images․

Essential Camera Components
Lenses focus light, shutters control exposure duration, and apertures manage depth of field—these core elements work harmoniously to capture stunning images with film․
The Lens: Focusing and Image Quality
The lens is arguably the most crucial component of any film camera, directly impacting the sharpness, clarity, and overall aesthetic of your photographs․ It’s responsible for gathering and focusing light onto the film plane․ Different lenses offer varying focal lengths, influencing the field of view and perspective․
A shorter focal length (e․g․, 28mm) provides a wider angle, ideal for landscapes and group shots, while a longer focal length (e․g․, 85mm) compresses perspective and is excellent for portraits․ Lens quality significantly affects image quality; higher-quality lenses generally exhibit sharper images, reduced distortion, and better light transmission․
Focusing is achieved by adjusting the lens elements to ensure the subject appears sharp on the film․ Manual focusing, common in many film cameras, requires precise adjustment using the focusing ring․ Mastering focusing techniques is essential for achieving consistently sharp images, especially when using wider apertures for shallow depth of field effects․ Remember that different lenses have different minimum focusing distances․
The Shutter: Controlling Exposure Time
The shutter is a critical mechanism within a film camera, governing the duration of time the film is exposed to light․ This exposure time, measured in seconds or fractions of a second, directly influences the brightness and motion depiction in your photographs․ Faster shutter speeds (e․g․, 1/500s) freeze motion, ideal for sports or wildlife, while slower shutter speeds (e․g․, 1 second) blur motion, creating a sense of movement or allowing for low-light photography․
Shutter speed is one of the three pillars of the exposure triangle, alongside aperture and ISO․ Understanding how to manipulate shutter speed is fundamental to achieving proper exposure and creative effects․ Many film cameras offer a range of shutter speeds, often selectable via a dial or lever․
Bulb mode allows for extremely long exposures, useful for astrophotography or light painting․ Accurate shutter speed selection is vital for avoiding motion blur or underexposure, especially in challenging lighting conditions․
The Aperture: Controlling Depth of Field
The aperture, often expressed as an f-number (e․g․, f/2․8, f/8, f/16), controls the size of the lens opening, regulating the amount of light reaching the film․ More importantly, it dramatically impacts the depth of field – the portion of the image that appears acceptably sharp․ A wider aperture (smaller f-number like f/2․8) creates a shallow depth of field, isolating the subject against a blurred background, perfect for portraits․
Conversely, a narrower aperture (larger f-number like f/16) yields a greater depth of field, keeping both foreground and background sharp, ideal for landscapes․ Aperture is another key component of the exposure triangle, working in tandem with shutter speed and ISO․
Mastering aperture allows photographers to creatively control focus and draw the viewer’s eye to specific elements within the frame, enhancing the storytelling potential of their images․
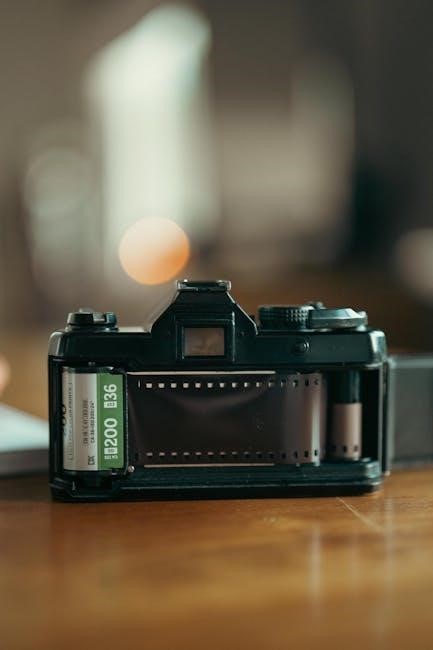
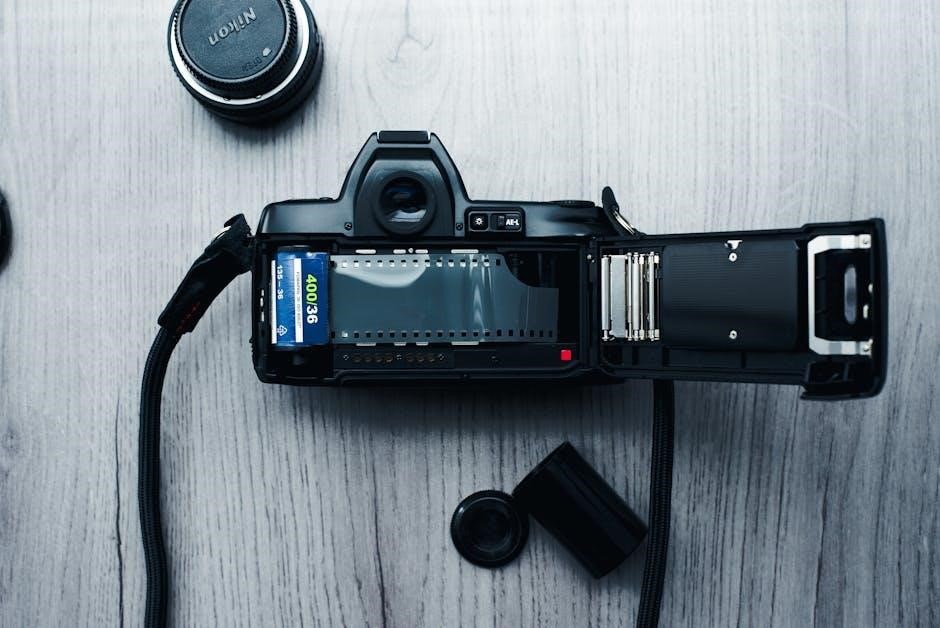
Loading and Unloading Film
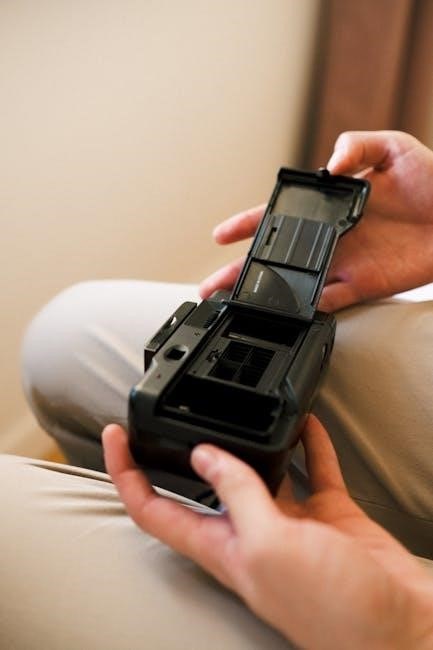
Proper film handling is crucial; carefully load film into the camera in subdued light, ensuring it’s correctly seated, and rewind it fully after exposure․
How to Load 35mm Film
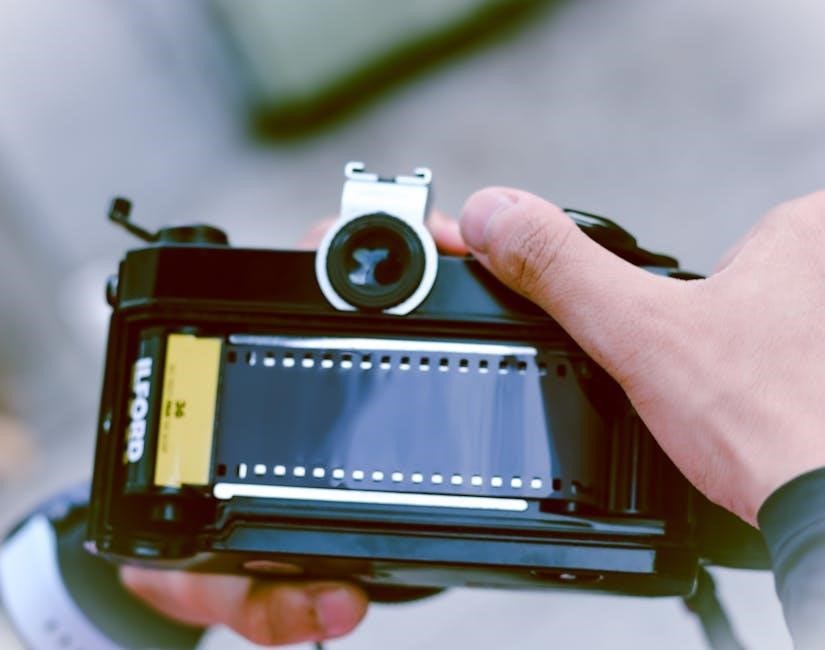
Loading 35mm film begins by opening the camera back, typically with a release latch․ Locate the film canister chamber and the take-up spool․ Place the film canister into the chamber, ensuring it seats correctly․ Gently pull the film leader across the camera body towards the take-up spool․
Carefully thread the film leader into the slots of the take-up spool, and advance the film using the rewind knob or the film advance lever․ Observe the sprocket holes engaging with the camera’s sprockets; this ensures proper film transport․
Close the camera back securely․ Advance the film several frames and check that it’s advancing smoothly․ Note the frame counter to keep track of exposures․ If resistance is felt, do not force it; something is likely misaligned․ Always load in subdued light to prevent fogging the film․
How to Load Medium Format Film
Loading medium format film requires a bit more care than 35mm․ Open the camera back, usually with a latch or knob․ Identify the film supply and take-up spools; these often differ in design․ Secure the film canister onto the supply spool, ensuring it’s firmly attached․
Carefully pull the backing paper and thread it onto the take-up spool, winding it a few turns to ensure it catches․ Gently guide the film across the film plane, ensuring it lies flat and engages with the pressure plate․
Close the camera back and advance the film using the film advance knob, counting the frames; Medium format film often has markings indicating frame numbers․ Check the film advance to confirm proper transport․ Avoid forcing the advance; a smooth operation is crucial․ Load in subdued light to protect the film․
Basic Shooting Techniques
Mastering exposure—aperture, shutter speed, and ISO—is key; precise focusing ensures sharp images, while understanding these elements unlocks film photography’s creative potential․
Understanding Exposure: Aperture, Shutter Speed, and ISO
Exposure is the cornerstone of photography, dictating the brightness and overall look of your images․ It’s a delicate balance between three key settings: aperture, shutter speed, and ISO․ Aperture, measured in f-stops (like f/2․8, f/8, f/16), controls the size of the lens opening, influencing both the amount of light reaching the film and the depth of field – how much of the image is in focus․
A wider aperture (smaller f-number) lets in more light and creates a shallow depth of field, ideal for portraits․ A narrower aperture (larger f-number) lets in less light but increases depth of field, suitable for landscapes․ Shutter speed, measured in seconds or fractions of a second (like 1/60, 1/250, 1 second), determines how long the film is exposed to light․ Faster shutter speeds freeze motion, while slower speeds allow more light in but can result in motion blur․
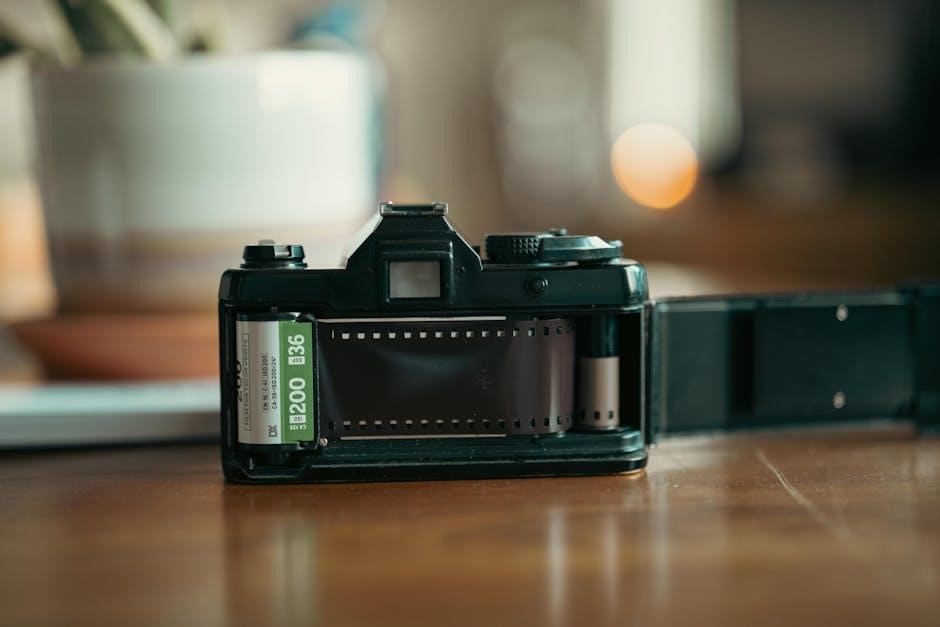
Finally, ISO represents the film’s sensitivity to light․ Lower ISO values (like 100) are less sensitive and produce finer grain, best for bright conditions․ Higher ISO values (like 400, 800, or higher) are more sensitive, allowing you to shoot in low light, but they introduce more grain․ Achieving proper exposure involves finding the right combination of these three settings to create a well-balanced image․
Focusing Techniques for Sharp Images
Achieving sharp focus is paramount in film photography, as correcting blur in post-processing isn’t an option․ Most film cameras utilize a rangefinder or a single-lens reflex (SLR) focusing system․ With an SLR, you view the scene directly through the lens, ensuring what you see is what you’ll capture․ Utilize the focusing screen’s split-image or microprism collar to precisely align the image for critical sharpness․
Rangefinders employ a separate viewfinder and a focusing patch․ Rotate the focus ring until the image in the patch appears sharpest․ Zone focusing is a technique where you pre-set the lens to a specific distance and rely on depth of field to keep subjects within that range in focus – useful for street photography․ Always double-check your focus, especially in challenging lighting conditions․ Practice makes perfect; consistent focus is key to capturing stunning film images․